
Users, roles and access
Create roles and ERP users, set exact permissions, give guardians portal access, and control when and from where people can sign in.
Users & Control is where the administrator decides who can open the ERP and what each person can do. You create roles, give each role exactly the permissions it needs, create a named user for each person, and choose how they sign in. The same module holds guardian accounts for the Parent portal and app, the public portal links, and the controls that hold or time ERP sign-ins.
Before you start#
- You need to be signed in as the administrator.
- Decide the roles your school needs, named by job (for example Fee Clerk, Class Teacher, Exam Coordinator). Give each role only what that job needs.
- One account per person. Never share the administrator password.
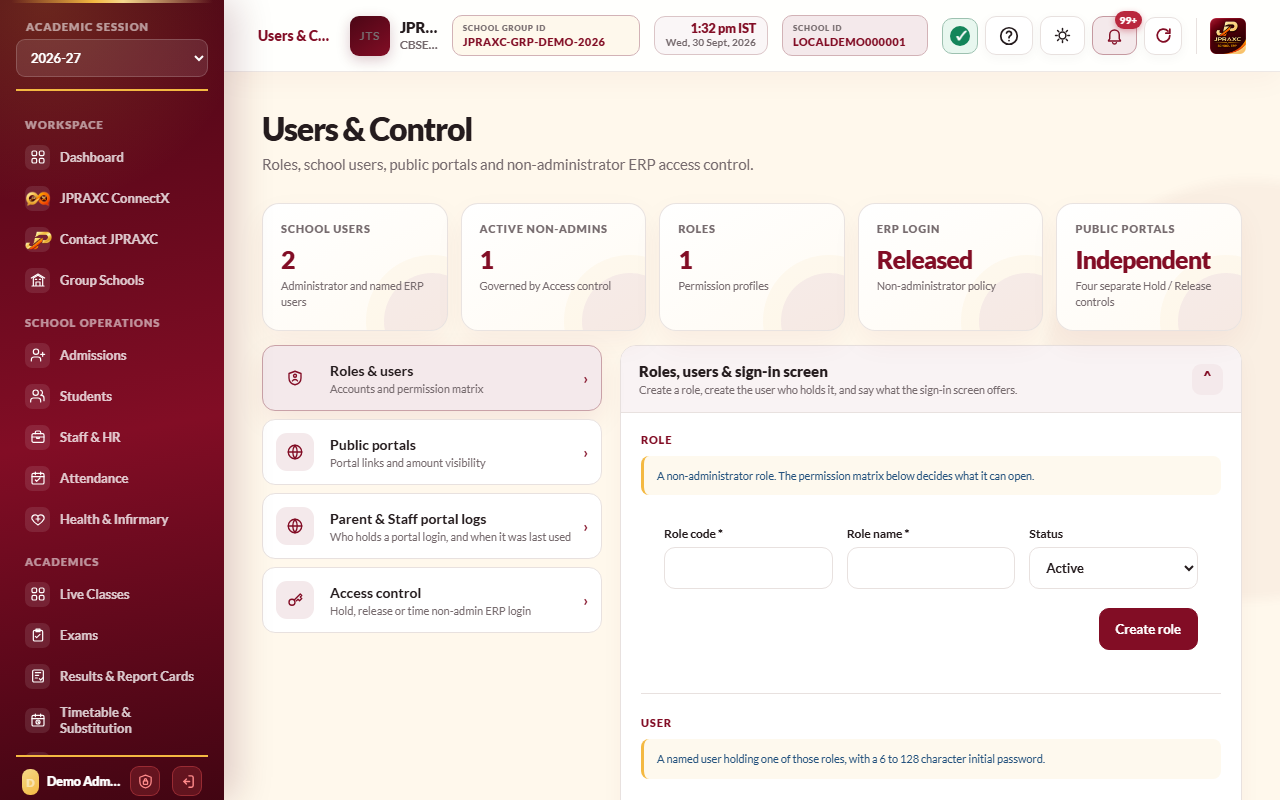
Users & Control has four panes: Roles & users, Public portals (Cloud edition only), Parent & Staff portal logs and Access control.
Create a role#
- Open Users & Control › Roles & users.
- In the Roles, users & sign-in screen card, under Role, type a Role code (short, for example FEECLERK) and a Role name (for example Fee Clerk).
- Leave Status on Active and select Create role.
A new role starts with no permissions.
Give the role its permissions#
- Scroll to Permission matrix.
- Choose the role in Role and select Open role.
- For each module the role needs, tick the actions it may take: View, Create, Update, Delete, Print and Approve.
- The tick at the start of a row gives every action in that module.
- The tick under a column heading gives that action in every module.
- Select Save role permissions.
Some actions need more than View. For example, showing a full Aadhaar number needs the module's Print permission, and taking a backup needs Create on Backup & Archives. Session archives, software updates and decisions in the approval queue are for the administrator only, whatever a role is given.
Create a user#
- In Roles & users, under User, fill in Login ID, Display name, Email and Phone.
- Choose the Role.
- Type an Initial password. Give it to the person privately.
- Choose Sign-in: Password only, or Password + authenticator app. With the app, the user sets it up at their next sign-in (see The second sign-in step).
- Select Create user.
- Test the account in a separate private browser window before the person starts work.
Manage existing users#
The School users register lists every account with its role, sign-in mode, status and last sign-in. The administrator's row says Protected and cannot be changed here.
- Change password: type a new password, or select Generate, then Change password. The current password cannot be shown. The user's other sessions end when it changes.
- Sign-in mode: switch between Password only and Password + authenticator app.
- Change status: Active, Locked or Disabled.
Choose what the sign-in screen shows#
Under Sign-in screen, User list on the sign-in screen has two choices:
- Offer the list: the sign-in page lists every active user's login ID to pick from.
- Type the ID: everyone types their login ID.
Select Save sign-in setting. Anyone who can open your sign-in page can read the list, so leave it on Type the ID if your sign-in page can be reached from the internet.
Give a guardian access to the Parent portal and app#
Cloud edition only.
- Open Users & Control › Parent & Staff portal logs.
- In Create guardian access, choose the Active student.
- Type a Guardian login ID. To add a brother or sister to an existing guardian account, use that account's login ID again.
- Fill in Guardian name, Relationship, and the Verified email and Verified mobile the school has checked.
- Select Create / link guardian access.
- For a new account, the ERP shows a One-time guardian activation code once. It works once and expires after a short time. Give it only to the guardian whose contact you verified.
The guardian then connects the Parent app with the school's School ID (copy it from the SCHOOL ID chip in the top bar) and signs in. See Mobile apps.
Look after guardian and staff portal accounts#
The Parent & Staff portal logs register lists every parent and staff portal login, who it belongs to, when it last signed in, failed attempts, and when the mobile app was set up. Filter it by Portal, Account status and Sign-in (for example Never signed in).
For a guardian account:
- Recovery code issues a one-time code the guardian uses to set a new password. Their current password keeps working until they use it.
- Hold pauses the account; Activate opens it again.
- Disable closes the account.
- Revoke beside a child's name removes that child from the account at once. Other children stay.
Staff portal passwords are set in Staff & HR; see Staff and HR.
Public portal links and amount visibility#
Cloud edition only.
- Open Users & Control › Public portals.
- Under Portal amount visibility, choose whether to Show student fee amounts in Parent Portal and Show staff salary amounts in Staff Portal. When off, families still see fee names, periods and Paid / Due / Advance status without the amounts; staff still see payroll months and payment status.
- Select Save amount visibility.
- Under Public portal links, select Load public portal links, then Copy beside the link you want to share.
If this pane says the public portals are blocked for your licence, contact JPRAXC support.
Hold, release or time ERP sign-ins#
- Open Users & Control › Access control.
- Under Non-administrator ERP access control, choose Non-administrator ERP login:
- Released — allow login: no restriction.
- Held — block new login: nobody except the administrator can sign in. Switching to this ends every current non-administrator session.
- Timed login window: set Daily window starts (IST) and Daily window ends (IST), and tick any days to exclude.
- Select Save ERP access control.
The administrator is never held out by this setting.
Hold or release a public portal#
Under Public portal access, each portal has its own Hold or Release button: Online Admission, Results Portal, Parent Portal and Staff Portal. These are separate from the ERP sign-in controls.
Approve a new computer or network#
The System IP approval register lists the network addresses people have signed in to the ERP from. When someone signs in with the right password from a new address, it is listed as Pending, and nobody can sign in from it until the administrator approves it.
- Approve lets the address sign in.
- Hold pauses an approved address; Release opens it again.
- Terminate ends access from that address. Undo termination puts it back on hold for review.
Holding or terminating an address ends the sessions using it.
Good to know#
- Changes made by users other than the administrator take effect at once and appear in the administrator's approval queue. See Approvals and the Audit Log.
- The Access control pane also holds the Second sign-in step policy.
- Staff portal and Staff app accounts are not ERP users. They are managed in Staff & HR.
Troubleshooting#
| Symptom | What to do |
|---|---|
| A user cannot see a module | Open the role in Permission matrix and tick View for that module. |
| A user sees a module but a button is missing | Tick the matching action (Create, Update, Delete, Print or Approve) for that module. |
| A user cannot sign in from a new computer or office | Look in Access control › System IP approval register for a Pending address and approve it. |
| No one except the administrator can sign in | Check Non-administrator ERP login. It may be Held or outside the timed window. |
| A guardian lost their password | Select Recovery code on their account and give them the code. |
| The Public portals pane is missing | The Offline edition does not include public portals. |
