
Exams and marks
Create an examination, schedule its papers across classes and sections, print admit cards and attendance sheets, and enter marks for a whole class at once.
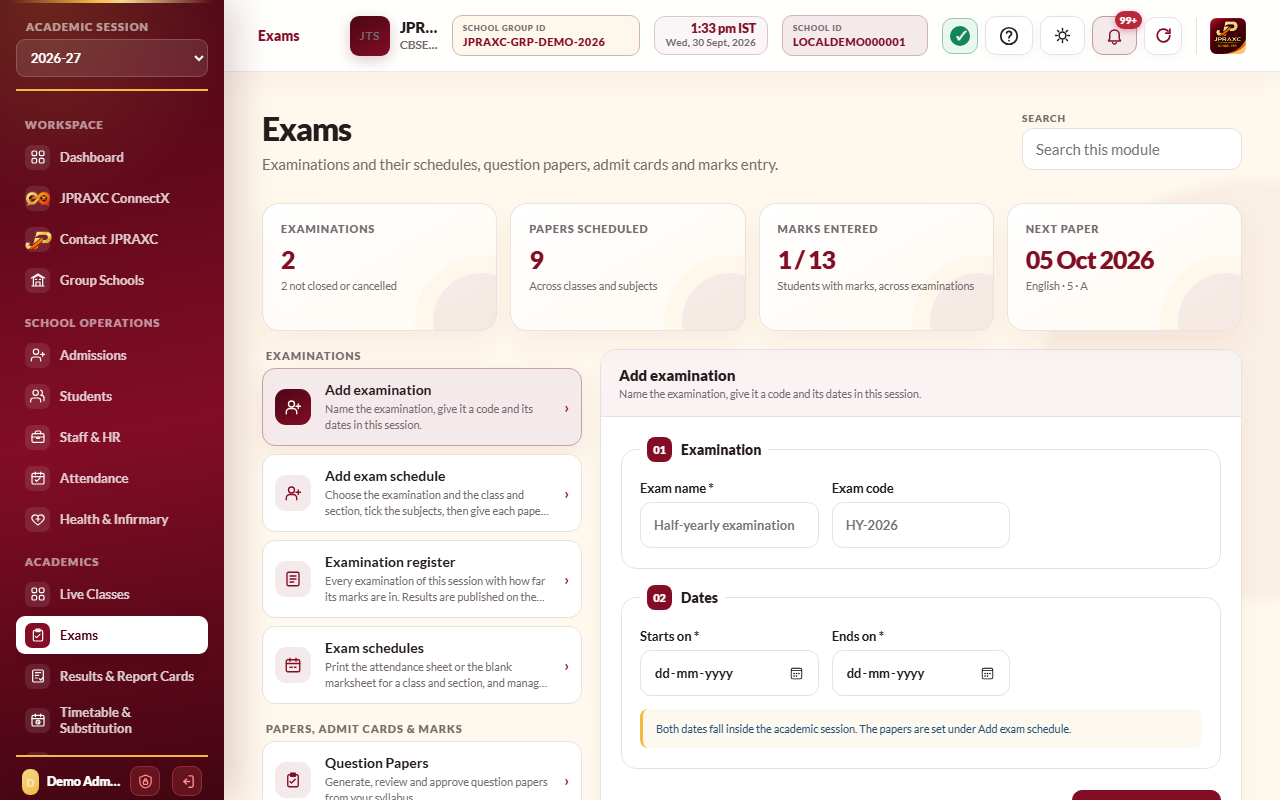
The Exams module holds each examination of the session, the papers each class sits, admit cards, and marks entry. What the marks become (marksheets, report cards and the Results portal) is in Results & Report Cards; see Results and report cards. Question papers are covered in Question papers.
Before you start#
- Your role needs the Exams · Results & Report Cards permission.
- Classes, sections, subjects and enrolled students must exist in the session chosen in the sidebar.
The module's panes are Add examination, Add exam schedule, Examination register and Exam schedules, then, under Papers, admit cards & marks: Question Papers, Admit cards and Marks entry.
Create an examination#
- Open Exams › Add examination.
- Type the Exam name (for example Half-yearly examination) and, if you use them, an Exam code (for example HY-2026).
- Set Starts on and Ends on. Both must fall inside the session.
- Select Create examination.
The examination starts in Draft and appears in the Examination register.
Schedule the papers#
- Open Exams › Add exam schedule.
- Choose the Examination.
- Choose the Class and Section. Under Other sections sitting the same papers, tick any other sections of that class that sit the same papers.
- Under Subjects, tick each subject that has a paper.
- Under Papers, type a Common venue if all papers are in one place. Then, for each subject, set the Date, Starts and Ends times, the Venue if different, and the Maximum and Minimum (pass) marks. For Classes 9 to 12 the marks are split into Theory max, Theory min, Practical max and Practical min.
- Select Save exam schedule.
The ERP saves one paper for each class, section and subject you chose.
Check, print and correct the schedule#
- Open Exams › Exam schedules.
- Choose the Examination, Class and Section.
- Select Attendance sheet or Blank marksheet to print the sheet the invigilator carries.
The register below lists every scheduled paper of the live examinations, class by class, with date, time, venue and marks. Use Edit or Delete on a paper. Papers of closed or cancelled examinations are not listed.
Move an examination through its stages#
In the Examination register, select Status on the examination, choose the new status, add a reason and select Update status.
| Status | Meaning |
|---|---|
| Draft | Being prepared. |
| Scheduled | Papers are set. Marks can be entered. |
| Marks open | Marks are being entered. Entering the first marks moves a scheduled examination here on its own. |
| Closed | Marking has finished. |
| Cancelled | The examination will not be held. A reason is required. |
An examination needs at least one paper before it can be Scheduled or Marks open. Reopening a closed or cancelled examination needs a reason. Publishing results is done in Results & Report Cards; the Results portal button on each row takes you there.
The register also shows, for each examination, how many students have marks entered out of how many sit it.
Print admit cards#
- Open Exams › Admit cards.
- Choose the Examination.
- Choose the class, section or one student. Leave them on "All" to print every card in that scope.
- Select Print admit cards.
Each card lists that candidate's own papers with the dates, hours and maximum marks.
Enter marks#
- Open Exams › Marks entry.
- Choose the Examination, the Class and the Section. Leave the name on Everyone to open the whole section, or choose one student.
- Select Open marks entry. The grid shows one row per student and one column per scheduled subject, with the maximum marks under each subject. Classes with practicals show a theory box (T) and a practical box (P).
- Type the marks. Each mark saves itself as you type. Press Enter or the down arrow to move to the next student, and the up arrow to go back.
- Type a Progress report remark for a student if you want one.
- When you have finished, select Save marks for … subjects to make sure everything is saved.
A blank box means the mark is not entered yet. The ERP refuses a mark above the maximum.
Teachers can enter marks from the staff portal or Staff app when their account has Marksheet register ticked: a class teacher for every paper of their section, and a subject teacher for their own subject in the sections they teach. They can enter marks only while the examination is at Marks open. See Staff and HR.
Good to know#
- The figure cards show the number of examinations, papers scheduled, marks entered across examinations, and the next paper.
- Scheduling a subject for a class uses the marks the school has recorded for that subject as the starting values.
Troubleshooting#
| Symptom | What to do |
|---|---|
| Add at least one valid examination schedule before changing this status | Add the papers in Add exam schedule first. |
| Marks can be entered only while an examination is scheduled or open for marks | Change the examination's status to Scheduled or Marks open. |
| This examination changed after you opened it | Someone else changed it. Refresh the module and try again. |
| A subject is missing from marks entry | Schedule that subject for the class and section in Add exam schedule. |
| A mark will not save | Check it is not above the maximum. A box that could not save offers a retry. |
