
Staff and HR
Add teaching and non-teaching staff, import a staff list, assign class teachers, change employment status and give staff their own portal and app login.
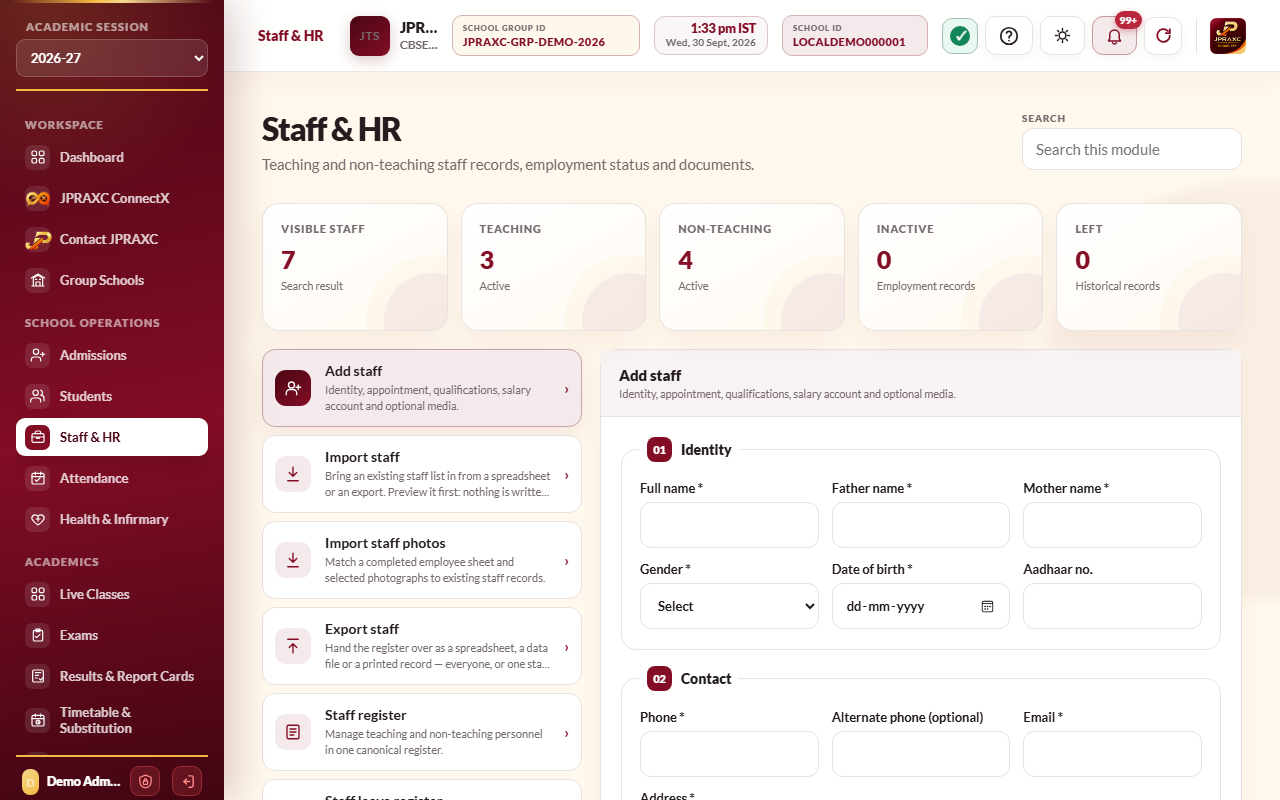
The Staff & HR module holds one employment record for every member of staff. Attendance, leave, payroll, the timetable, substitution and the Staff app all read from it. This guide covers adding and importing staff, class teachers, employment status, exports, and the staff portal and app login. Leave is covered in Staff leave and pay in Payroll and statutory deductions.
Before you start#
- Your role needs the Staff & HR permission.
- Classes and sections must exist before you assign class teachers. Subjects must exist before you can tick them on a teacher's record.
The module has these panes: Add staff, Import staff, Import staff photos, Export staff, Staff directory, Staff leave register and Staff portal password & access.
Add a member of staff#
- Open Staff & HR › Add staff.
- 01 Identity: Full name, Father name, Mother name, Gender, Date of birth and, optionally, Aadhaar no.
- 02 Contact: Phone, optional Alternate phone, Email and Address.
- 03 Appointment: Staff type (Teaching or Non-teaching), Designation, Joining date, Previous school, and optionally the Biometric code and RFID card no. used by attendance devices.
- Leave allowances: choose the Leave allowance basis and the days of casual, sick and other paid leave. See Staff leave.
- 04 Qualifications: tick the Qualifications, Degrees and Subjects / roles. Choose Other to name something the list does not have.
- 05 Salary account: bank name, account holder, account number, IFSC and PAN, only if the school is authorised to hold them.
- 06 Records: the photo, supporting documents and notes.
- Select Create staff member.
The member of staff gets an employee number and appears in the Staff directory. Their pay is set separately in Payroll & Statutory › Add staff salary.
Import a staff list#
- Open Staff & HR › Import staff.
- Download the blank format if you need one: choose a format and select Download blank format.
- Fill in one person per row. Full Name, Phone, Designation and Staff Type (teaching or non-teaching) are required on every row. The other columns are optional: Father Name, Mother Name, Gender, Date of Birth, Aadhaar No, Alternate Phone, Email, Address, Joining Date, Previous School, Monthly Salary, Biometric Code, RFID Card No, Qualifications, Degrees, Subjects Roles, Bank Name, Account Holder Name, Bank Account No, IFSC, PAN No, Notes, CL Days, SL Days, Other Leave Days and Half Day Limit.
- Choose the file in Staff file (CSV, TSV, JSON, .xlsx or .ods) and select Preview.
- Check the rows, then select Import staff.
Nothing is written until you import.
Add staff photos in bulk#
- Open Staff & HR › Import staff photos.
- Fill in the blank roster: Employee ID, Full Name and Photo File Name for each person. The file name must exactly match the image.
- Choose the roster and select all the photos.
- Select Preview photo matches, then Import matched photos.
The staff directory#
Filter by Staff group (Teaching or Non-teaching) and Staff member, or search by employee number, name, phone or designation. A class teacher's row shows their class.
Each row has:
- Joining form: print the staff joining form.
- Edit: change the record, including leave allowances.
- Assign class teacher (active teaching staff only): see below.
- Upload: add or replace the photo and documents.
- Status: change the employment status.
Assign a class teacher#
- In the Staff directory, select Assign class teacher on the teacher's row.
- Choose the Class and Section. A section already held by another teacher is shown with their name and cannot be chosen until it is freed.
- Select Save assignment.
Each class and section has one class teacher. To remove an assignment, choose No class — remove the current assignment. Class teachers can see their own class in the staff portal and Staff app, depending on the permissions you give them below.
Change employment status#
- Select Status on the row.
- Choose Active, Inactive or Left, and give a Reason.
- Select Update status.
Only active staff can be given a portal login.
Give a member of staff their portal and app login#
The staff portal and the JPX Staff app use a login set here. It is separate from ERP users.
- Open Staff & HR › Staff portal password & access.
- Choose the Active staff member.
- Type a New password and give it to them privately.
- Under What this staff portal account may open, tick only what they need:
- Student register: the class teacher's own class and section.
- Marksheet register: marks for the class teacher's own section, and for a subject teacher's own subject in the sections they teach, including entering marks while an examination is open for marks.
- Mark class attendance: the class teacher marks their own class register.
- Write the class E-Diary: record what was covered in each of their own periods.
- JPRAXC ConnectX with students: talk with the families of their own class. The office does not sit in these conversations.
- Question Papers: use the question paper generator.
- View fee collections.
- Self attendance from the Staff app: mark their own attendance from their phone, inside the school's area (see Attendance).
- Select Set / reset password. Saving also activates the account.
With nothing ticked, the account can still see the person's own profile, attendance and salary.
The register below lists each account with its employee (login) ID, employment status, portal status, permissions and last sign-in. Use View, Update password, Hold or Activate, and Delete on each row. Staff connect the Staff app with the school's School ID (copy it from the SCHOOL ID chip in the top bar). See Mobile apps.
Staff portal and app logins are available on the Cloud edition.
Export staff#
- Open Staff & HR › Export staff.
- Choose Every staff member, Teaching only or Non-teaching only.
- Choose a data file format, or Printable staff register (PDF / print).
- Untick any details you do not want included, and select Export staff.
Good to know#
- Salary amounts in the staff portal follow Users & Control › Public portals › Show staff salary amounts in Staff Portal.
- Aadhaar numbers already on a record show masked, with Show number for users allowed to print in this module. Each reveal is recorded in the Audit Log.
Troubleshooting#
| Symptom | What to do |
|---|---|
| Assign class teacher is missing | The person is non-teaching or not active. |
| Create classes and sections in Settings before assigning class teachers | Create them in School Settings › Class & section configuration. |
| A person is missing from Active staff member | Only active staff can get a portal login. Check their status. |
| A staff import row fails | Each row needs Full Name, Phone, Designation and Staff Type. |
| A teacher cannot see their class in the Staff app | Assign them as class teacher and tick the permissions they need, then ask them to sign in again. |
